Authentication
Delegated OAuth to start self-serve, service credentials for unattended backends.
How to authenticate
| Mode | Who | Credential | Issued by | Setup |
|---|---|---|---|---|
| API key | Your own backend calling your own organization | A static key (agk_…) sent as Authorization: Bearer | Aginera — Settings → API | Self-serve — create a key and paste it; nothing to exchange |
| Delegated | Agents and backends acting for a signed-in user; people in ChatGPT, Claude or another MCP client | OAuth 2.1 authorization code + PKCE, with refresh tokens | https://auth.aginera.ai | Self-serve — register a public client and start today |
| Service | Fully unattended partner backends via Entra | OAuth 2.0 client credentials | Microsoft Entra ID (Aginera tenant) | Enterprise onboarding |
All three produce a bearer credential for Authorization: Bearer … against https://api.aginera.ai/partner/v1, and all hit the same services, permissions and billing. Browser session tokens are never accepted.
Which to use. Calling Aginera from your own backend for your own organization? Create an API key in Settings → API — paste it and go, no OAuth handshake. Building an agent, or acting on behalf of other users? Use delegated OAuth (below). See the REST quickstart for each flow end to end.
API keys
The simplest credential — a static key you use directly, with no token to exchange or refresh:
curl https://api.aginera.ai/partner/v1/projects -H "Authorization: Bearer agk_..."
Create a key
Any signed-in organization admin can create one from the app — no code required:
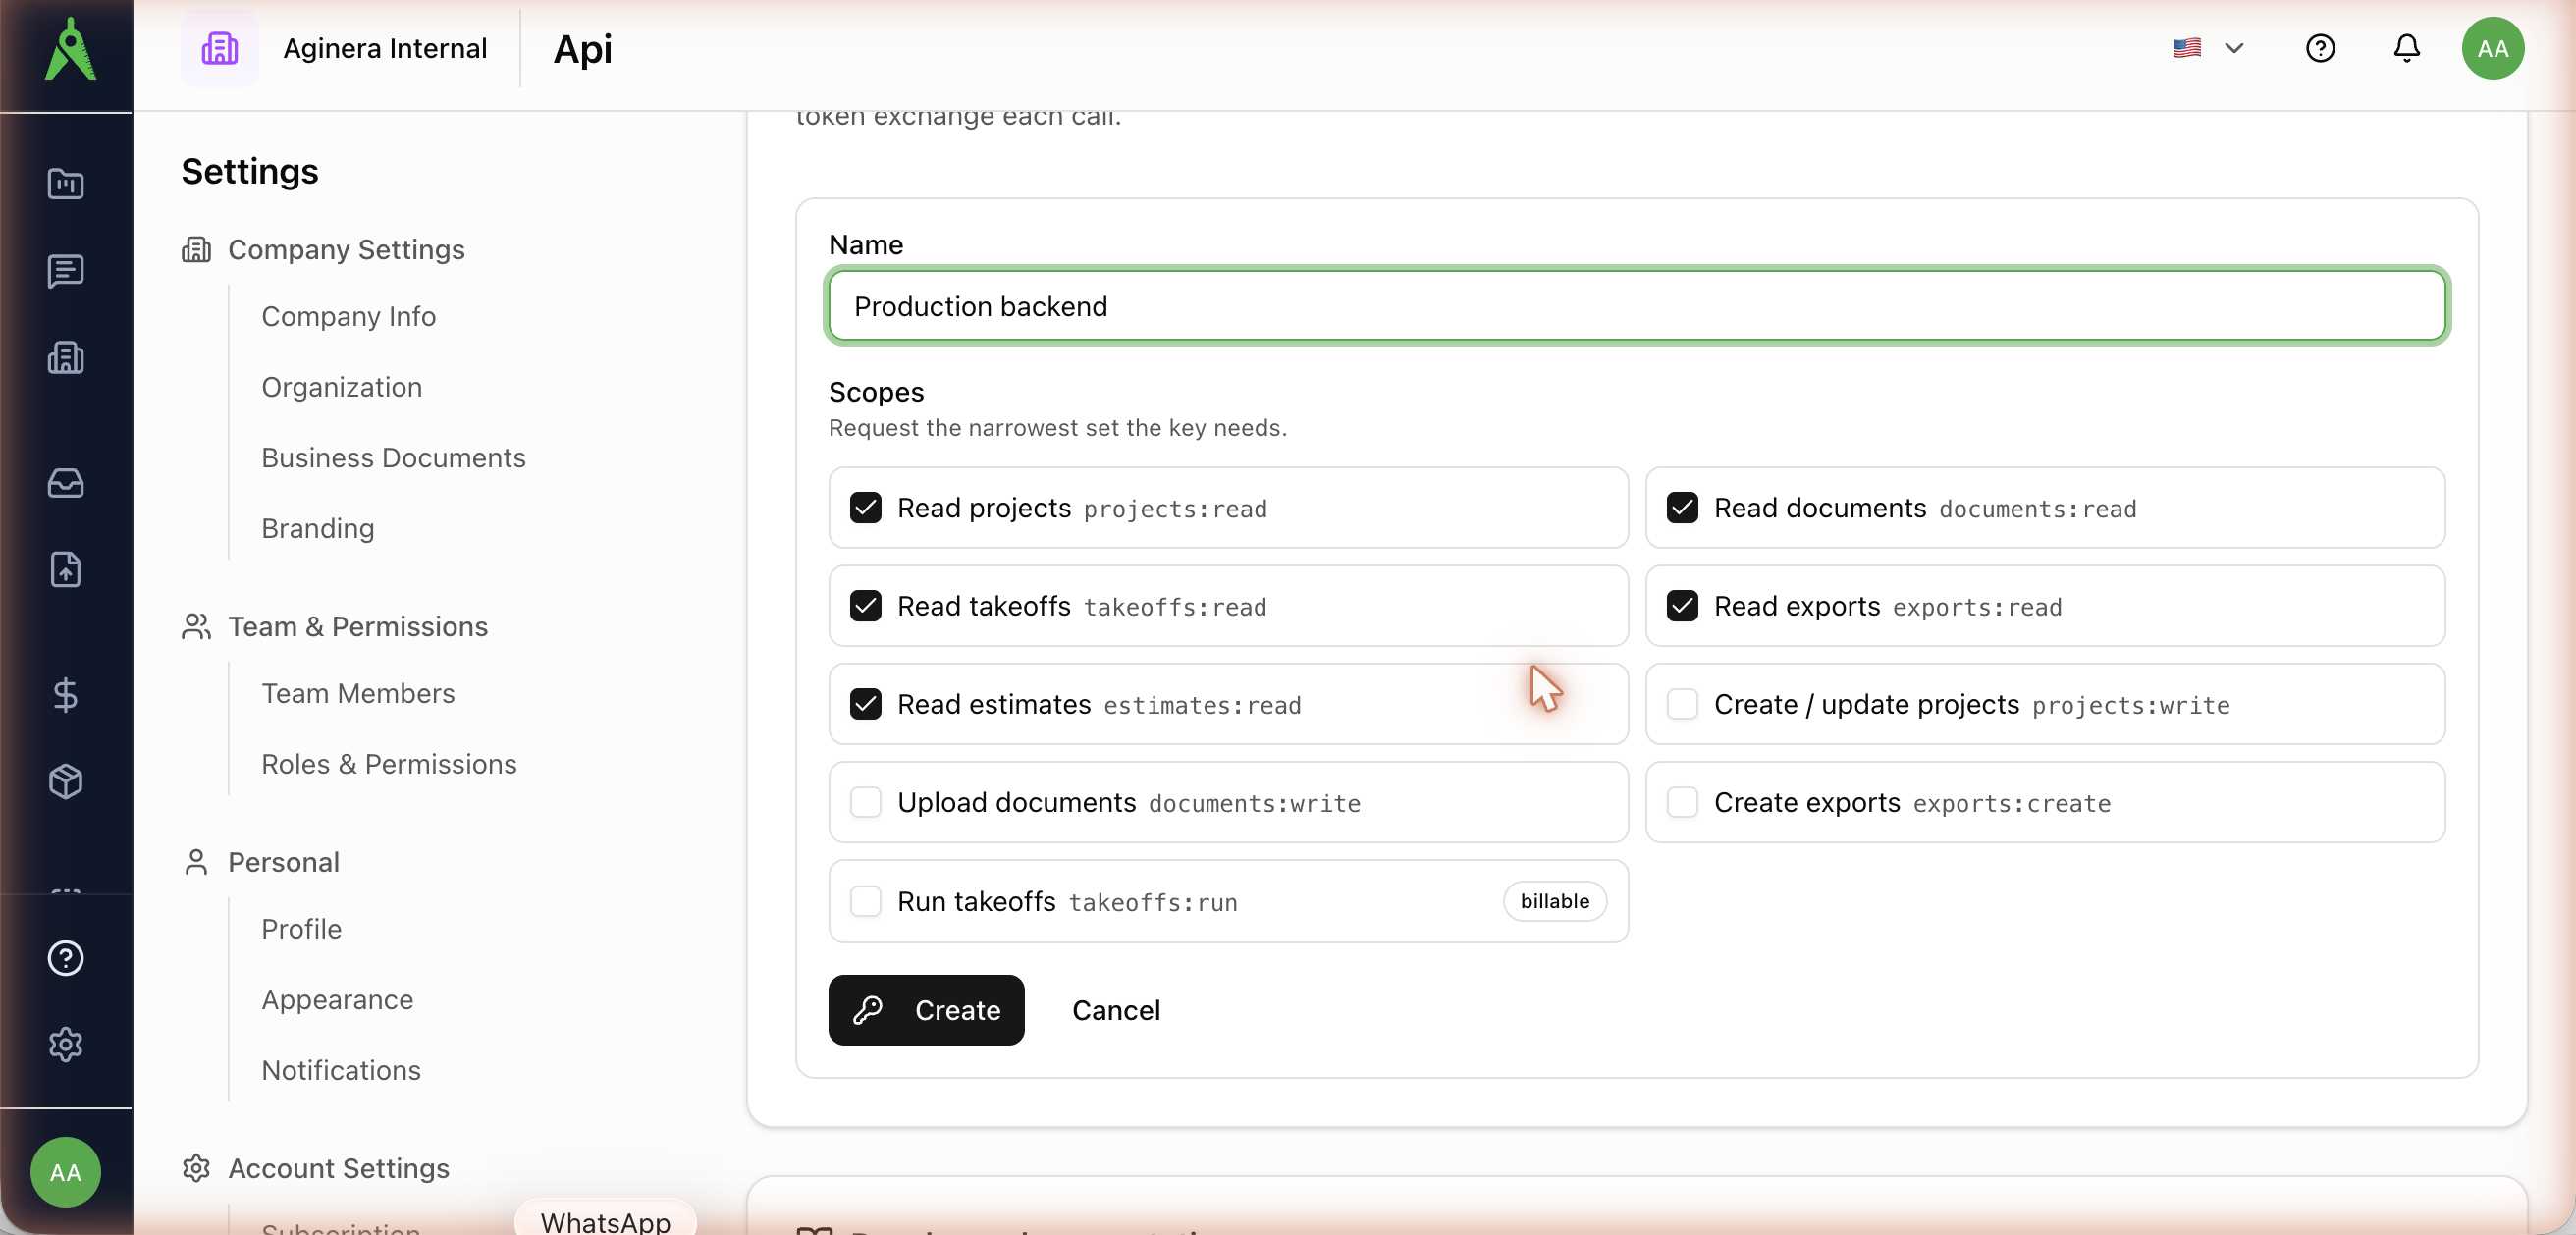
1. Open Settings → API and find the API keys card. Click Create API key, give it a name, and choose the scopes it needs. Request the narrowest set — the read scopes are on by default; takeoffs:run is marked billable.
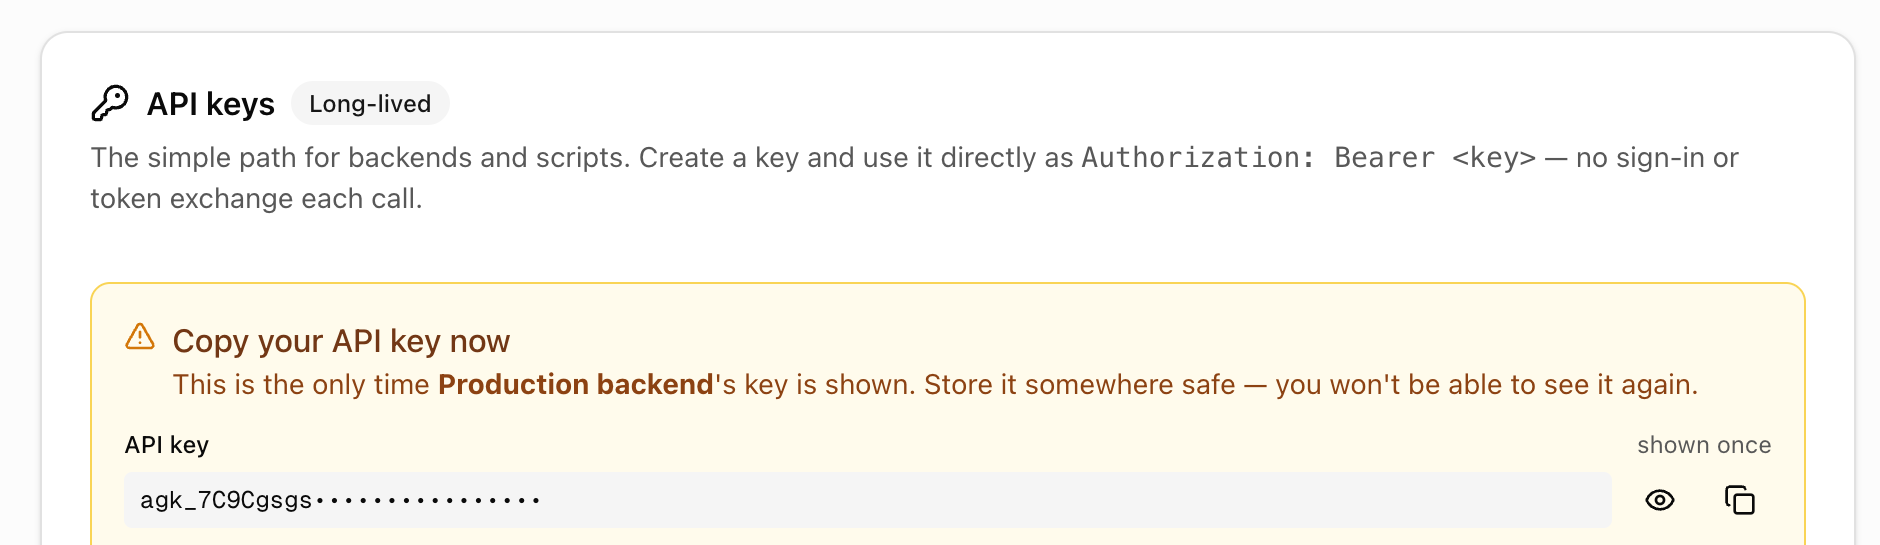
2. Click Create. The key is shown once — copy it now and store it somewhere safe. You won't be able to see it again; if you lose it, revoke it and create a new one.
3. Use it on every request as Authorization: Bearer agk_… against https://api.aginera.ai/partner/v1.
A key is scoped to the organization and to the scopes chosen at creation, is metered and billed like any other usage, and can be listed and revoked at any time on the same screen. Automating provisioning instead? The same actions are available as POST / GET / DELETE /oauth/api-keys (session-authed). The key is the credential — keep it secret.
How the OAuth handshake works
There's no API key to paste. Instead your app does a short, one-time handshake with auth.aginera.ai and comes away with a token it can use — and refresh — from then on. Think of it like a valet key: the user approves once, and your app gets access that's limited to the scopes they granted, tied to their organization, and set to expire.
Four parties take part: your app (the "client"), the user who approves, Aginera's authorization server (auth.aginera.ai, which issues tokens), and the API (api.aginera.ai/partner/v1, which accepts them).
Step by step:
- Register your app — once.
POSTto the registration endpoint with a name and aredirect_uri(where Aginera sends the user back). Because it's a public client (token_endpoint_auth_method: "none") no secret is issued — you get aclient_idyou reuse forever. - Make a PKCE pair. Since there's no secret, PKCE proves it's really your app finishing the flow: generate a random verifier (keep it) and send its SHA-256 challenge in the next step.
- Send the user to approve. Open a browser to
authorizewith yourclient_id,redirect_uri, thecode_challenge, and thescopes you want. The user signs in and clicks Allow — this ties the token to their organization and only the scopes they approved. - Aginera returns a one-time code. It redirects back to your
redirect_uriwith?code=…. The code is useless on its own. - Exchange the code for tokens.
POSTthe code plus the verifier to/oauth/token. Aginera checks the verifier against the earlier challenge and returns anaccess_token(valid ~1 hour) and arefresh_token. - Use it, and keep it alive. Send
Authorization: Bearer <access_token>on every API call; before the hour is up,POSTgrant_type=refresh_tokenfor a fresh one — no user needed.
The quickest way — let the app do it
If you're signed in to Aginera, open Settings → API → Get a token now: it runs this whole handshake in your browser, then hands you a real access token (and a ready-to-run curl) to copy. The REST quickstart has the same flow as runnable code.
Delegated: register a client
No client secret is issued. Register a public client (token_endpoint_auth_method: "none") at the registration endpoint, or advertise a Client ID Metadata Document — both are supported (client_id_metadata_document_supported: true). Then run authorization code + PKCE (code_challenge_method=S256) and exchange the code for an access token plus a rotating refresh token.
Scopes
projects:read/write/delete, documents:read/write/delete, takeoffs:read/run/review/delete, exports:read/create, estimates:read/generate, billing:read/write, events:read, webhooks:manage. A token only ever carries the scopes it was granted; request the narrowest set you need. Billable scopes (takeoffs:run, estimates:generate) and destructive scopes (*:delete) are highlighted on the consent screen.
Discovery
- Authorization server metadata:
https://auth.aginera.ai/.well-known/oauth-authorization-server(listsauthorization_endpoint,token_endpoint,registration_endpointandscopes_supported) - Protected resource metadata:
https://mcp.aginera.ai/.well-known/oauth-protected-resource(agents) andhttps://auth.aginera.ai/.well-known/oauth-protected-resource(REST →https://api.aginera.ai/partner/v1) - Public signing keys:
https://auth.aginera.ai/.well-known/jwks.json
Delegated access tokens are RS256, iss=https://auth.aginera.ai, aud=https://mcp.aginera.ai, and expire in one hour; refresh before expiry with grant_type=refresh_token.